
Why Make This Recipe
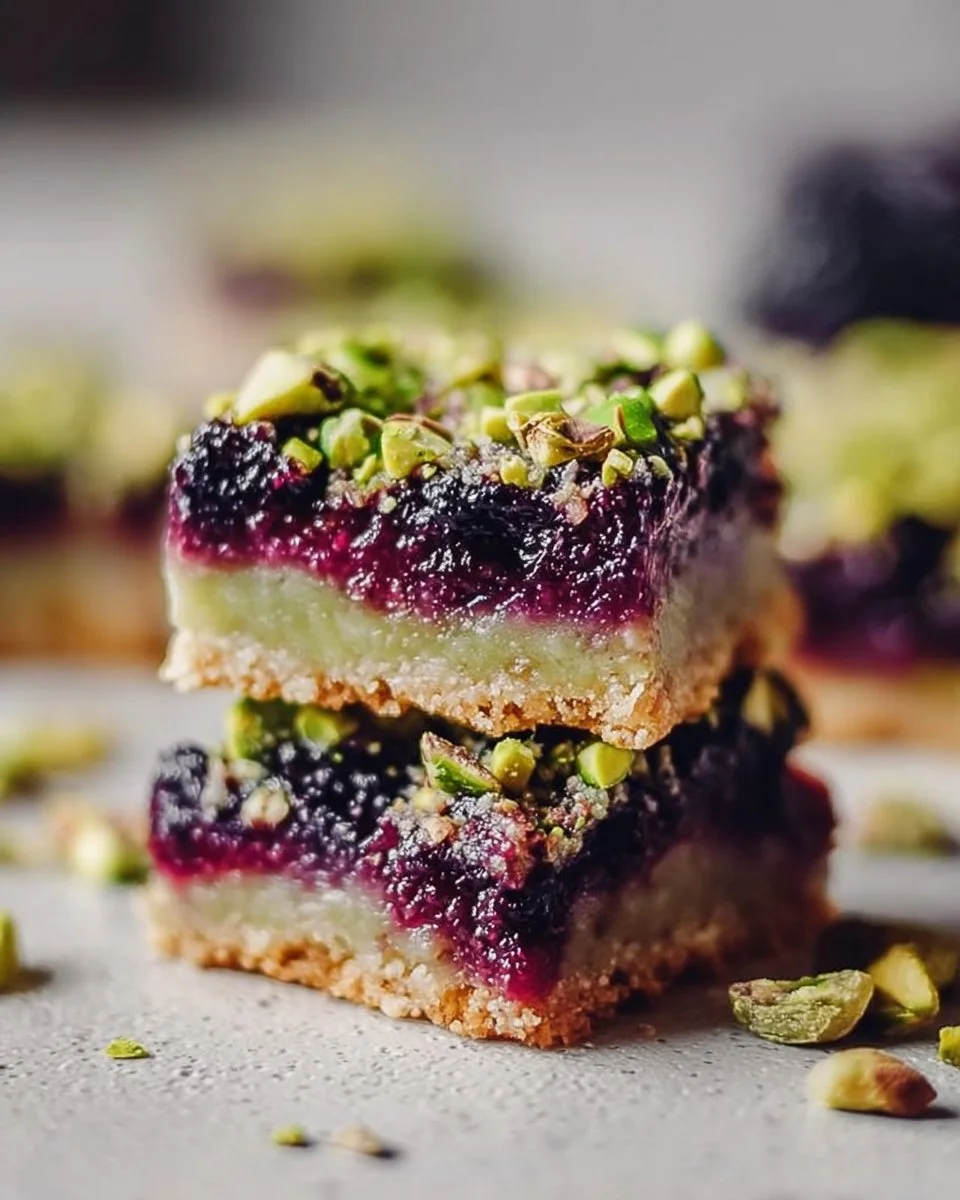
Blackberry Pistachio Dream Bars are not just a treat for your taste buds; they bring together the sweetness of blackberries and the crunch of pistachios in a delightful way. Whether you’re looking for a dessert to impress guests or a sweet snack to enjoy at home, these bars hit the spot. They are easy to make, and the combination of flavors makes them irresistibly good.
How to Make Blackberry Pistachio Dream Bars
Making these bars is a straightforward process that involves three main parts: the crust, the filling, and the topping.
Ingredients
- 1 cup All-Purpose Flour (or gluten-free flour)
- 1/2 cup Unsalted Butter (cold and cubed)
- 1/4 cup Granulated Sugar
- 1/4 teaspoon Salt
- 1 large Egg Yolk
- 2-4 tablespoons Ice Water
- 2 cups Fresh Blackberries (or raspberries/blueberries)
- 1/2 cup Granulated Sugar (adjust as necessary)
- 1 tablespoon Lemon Juice
- 2 tablespoons Cornstarch
- 1/2 cup Light Brown Sugar (or granulated sugar)
- 1 teaspoon Baking Powder
- 1 cup Pistachios (shelled and unsalted)
- 1/2 cup Unsalted Butter (cold and cubed)
- 1 large Egg
- 1 teaspoon Vanilla Extract
Directions
-
Make the Crust: In a large bowl, mix the flour, granulated sugar, and salt. Add the cold cubed butter and blend until the mixture looks like coarse crumbs. Stir in the egg yolk and enough ice water to bring the dough together. Press this mixture into the bottom of a greased baking dish. Pre-bake at 350°F (175°C) for 15 minutes.
-
Prepare the Blackberry Filling: In another bowl, mix the blackberries, 1/2 cup of sugar, lemon juice, and cornstarch gently. Spread this mixture over the pre-baked crust.
-
Make the Pistachio Topping: In a mixing bowl, cream together 1/2 cup cold butter and light brown sugar. Add the egg and vanilla extract and mix until combined. Fold in the flour and baking powder, then add the pistachios.
-
Assemble and Bake: Spread the pistachio mixture over the blackberry layer. Bake for 25-30 minutes until the topping is golden brown and set. Let it cool before cutting into bars.
How to Serve Blackberry Pistachio Dream Bars
Cut the bars into squares and serve them warm or chilled. You can place them on a nice plate and, if you want, dust them with powdered sugar or serve with a scoop of vanilla ice cream for a special touch.
How to Store Blackberry Pistachio Dream Bars
Store any leftovers in an airtight container at room temperature for up to three days. If you want to keep them longer, refrigerate them for up to a week. You can also freeze these bars for up to three months. Just make sure they are well-wrapped!
Tips to Make Blackberry Pistachio Dream Bars
- Ensure Butter is Cold: Cold butter helps create a flaky crust, so don’t skip this step.
- Adjust Sweetness: Taste the blackberry filling before spreading it on the crust, and adjust the sugar as needed.
- Chill Before Cutting: For better slicing, let the bars cool completely before cutting them into squares.
Variation
You can easily swap out the blackberries for other berries like raspberries or blueberries, depending on what you have on hand or prefer.
FAQs
Q: Can I make these bars gluten-free?
A: Yes, you can use a gluten-free flour blend instead of all-purpose flour for the crust.
Q: How long do the bars last?
A: They can be stored at room temperature for up to three days or refrigerated for up to a week.
Q: Can I use frozen berries instead of fresh?
A: Yes, frozen berries can be used, but you may need to increase the cooking time slightly. Make sure they’re thawed and drained to prevent excess moisture.
Blackberry Pistachio Dream Bars
Delight in these Blackberry Pistachio Dream Bars that blend the sweetness of blackberries with the crunch of pistachios for a delicious treat.
- Prep Time: 15 minutes
- Cook Time: 30 minutes
- Total Time: 45 minutes
- Yield: 9 servings 1x
- Category: Dessert
- Method: Baking
- Cuisine: American
- Diet: Vegetarian
Ingredients
- 1 cup All-Purpose Flour (or gluten-free flour)
- 1/2 cup Unsalted Butter (cold and cubed)
- 1/4 cup Granulated Sugar
- 1/4 teaspoon Salt
- 1 large Egg Yolk
- 2–4 tablespoons Ice Water
- 2 cups Fresh Blackberries (or raspberries/blueberries)
- 1/2 cup Granulated Sugar (adjust as necessary)
- 1 tablespoon Lemon Juice
- 2 tablespoons Cornstarch
- 1/2 cup Light Brown Sugar (or granulated sugar)
- 1 teaspoon Baking Powder
- 1 cup Pistachios (shelled and unsalted)
- 1/2 cup Unsalted Butter (cold and cubed)
- 1 large Egg
- 1 teaspoon Vanilla Extract
Instructions
- Make the Crust: In a large bowl, mix the flour, granulated sugar, and salt. Add the cold cubed butter and blend until the mixture looks like coarse crumbs. Stir in the egg yolk and enough ice water to bring the dough together. Press this mixture into the bottom of a greased baking dish. Pre-bake at 350°F (175°C) for 15 minutes.
- Prepare the Blackberry Filling: In another bowl, mix the blackberries, 1/2 cup of sugar, lemon juice, and cornstarch gently. Spread this mixture over the pre-baked crust.
- Make the Pistachio Topping: In a mixing bowl, cream together 1/2 cup cold butter and light brown sugar. Add the egg and vanilla extract and mix until combined. Fold in the flour and baking powder, then add the pistachios.
- Assemble and Bake: Spread the pistachio mixture over the blackberry layer. Bake for 25-30 minutes until the topping is golden brown and set. Let it cool before cutting into bars.
Notes
For better slicing, let the bars cool completely before cutting them into squares. They can be served warm or chilled, and dusted with powdered sugar or accompanied by vanilla ice cream.
Nutrition
- Serving Size: 1 bar
- Calories: 250
- Sugar: 15g
- Sodium: 150mg
- Fat: 12g
- Saturated Fat: 6g
- Unsaturated Fat: 6g
- Trans Fat: 0g
- Carbohydrates: 30g
- Fiber: 2g
- Protein: 4g
- Cholesterol: 30mg
Keywords: blackberry bars, pistachio dessert, easy desserts